¶ 1. 簡介
Welcome to Bakery, the place to mix, knot, and bake only the finest ingredients for your BredOS. With Bakery you will be guided through the entire process from picking the right flour to the best knoting technice to the exact amount of time it needs to rise. So let's get started!
¶ 2. Burning the image
After you downloaded the .iso file from our Github page burn it to a USB Stick, for example with Rufus, or burn a DVD. Insert your installation media into your PC and start your computer.
¶ 3. Bakery
¶ 3.1 Warm Welcome
- Bakery does start automatically on boot as long it hasnt been completed. Also, there is an Desktop Link to start it without rebooting. To start the setup choice between online or offline installation.
Online Installation is under construction right now. Please use offline install.

¶ 3.2 Bred is enjoyed all over the world
- Before we start our journey we need to know how we should comunicate the best. What language do you speak? What language do you speak, what timeformat you use and what currency you are familar with? And what currency you are familiar with?
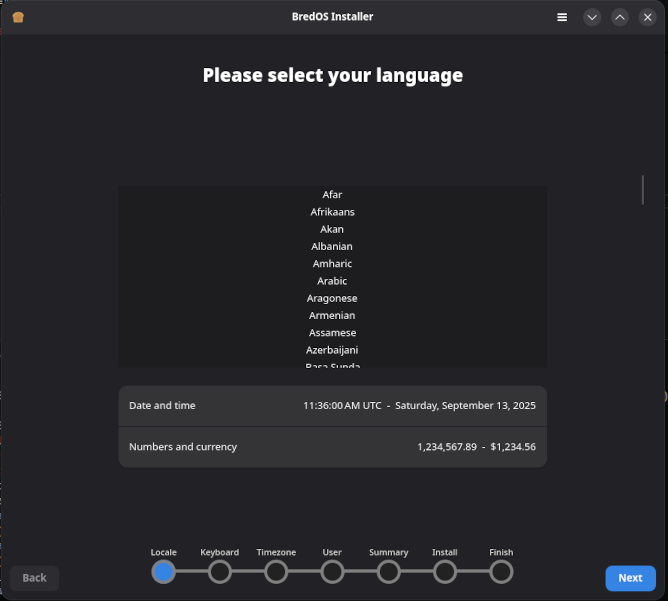
Look up your prefered language and click on it. A window then pops up where you can choose your locale. Time and dateformat and your currency should be filled in automatically. Please check them before continuing and feel free to alter them to your preferences.
¶ 3.3 About the kneading technique
Let's talk about knotting. All humans are different so there is no "true" knotting technice. To accommodate this, you can choose you technique based on your country.
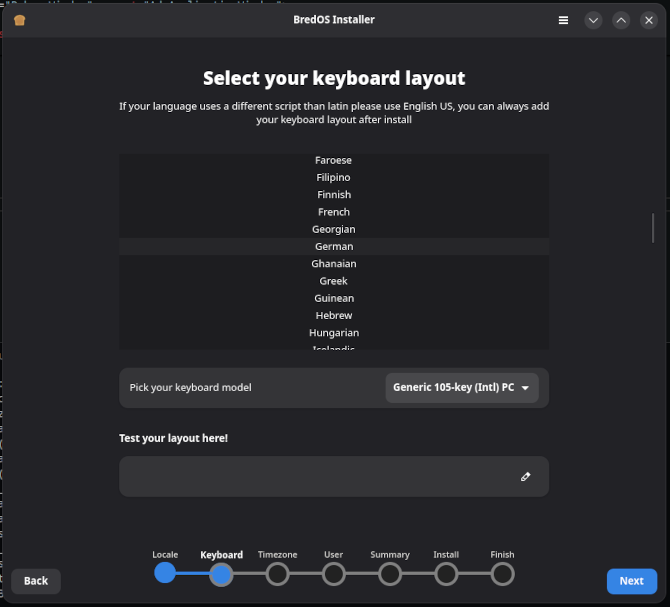
After you clicked on your country you can choose your layout. As its name suggests "Normal" is the layout mostly used. If you are unsure use this. If you have a unusual keyboard, like the ones apple sells, choose the layout accordingly.
Use the textbar to test your layout. This is important later when you have to type in your password!
¶ 3.4 The process of rising
- Here at Bakery we work with love. So we fully admit that Bred needs time to become the beloved product we all know. For that we need to know the timezone you are in.
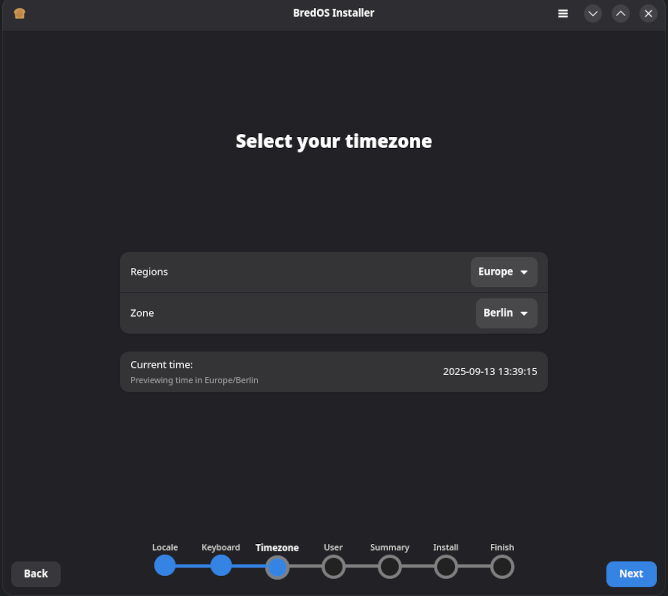
Select your Region and Zone with the dropdown menus. Your current time then should show up just below them for you to make sure the time is set correctly.
¶ 3.5 While we wait, we get to know each other
- Now that our dought is knotted and we know how long it will take it to rise, we have some time to know each better. Tell me, what’s your name? Do you have a nickname? Tell me, whats your name, do you have a nickname and what name would you give your Bred to if i would ask?
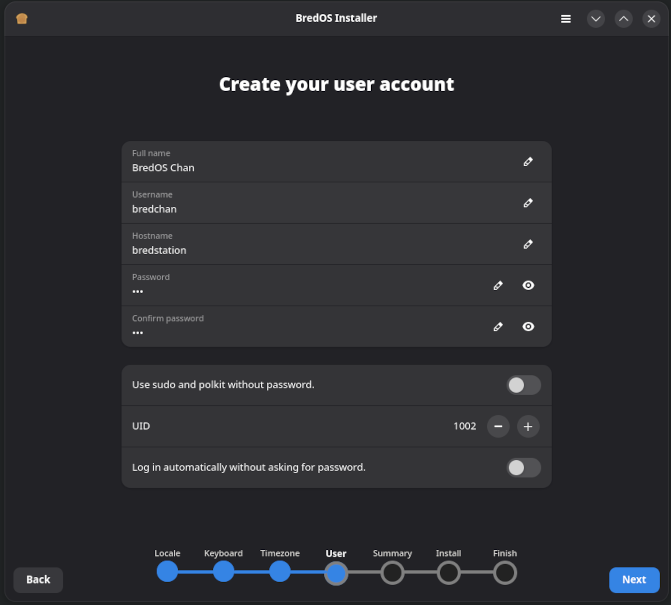
Please fill in your name, username, and hostname. The hostname will be used as a friendly name on your network. Then enter your password twice. You can use the eye icon to show or hide your password.
If you want to disable password protection for sudo and polkit, toggle the switch accordingly.
Please be aware that disabling password-protection does allow to run a program at root-level without password! This can be dangerous!
Every user has an ID assigned to them. This ID is used internally by programs, the file system, and more. You can change it if you want, but usually, there’s no need to.
If you want to skip the LightDM login screen and log in to your system without a password, toggle the switch accordingly.
¶ 3.6 Sharing is caring
- As you may want to share your storage with other things, we now prepare spliting it in parts. Or do you want to fill it all up with Bred? Thats how we would choose but we respect your choice either way.
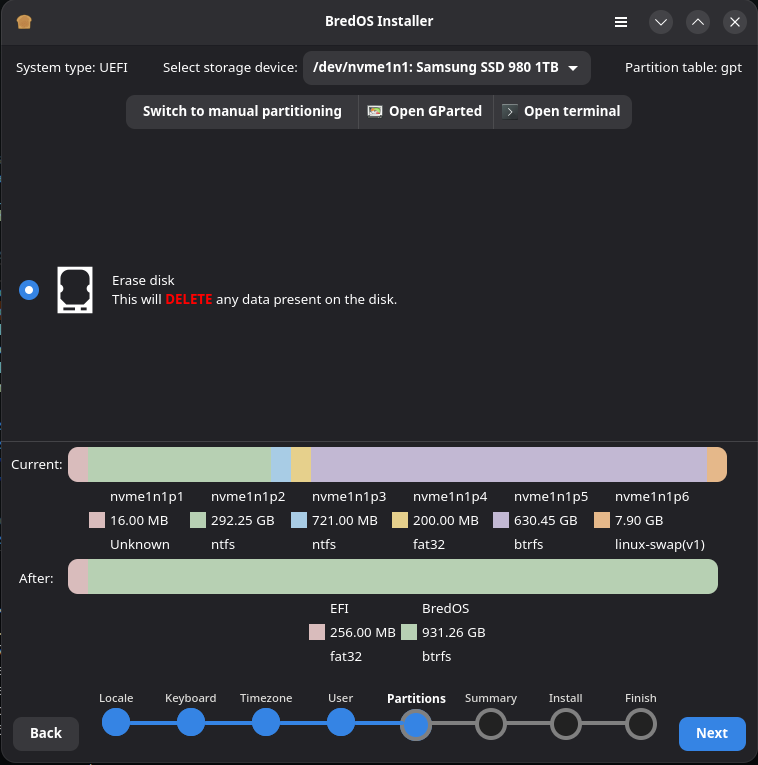
Select the storage device where you wish to install BredOS. If you prefer BredOS to be installed on the entire disk, choose "Erase Disk" and then click "Next."
This will delete any data on the Disk!
If you have data on the disk that you want to preserve, click "Open GParted" to resize the existing partitions as needed. Then create two new partitions: one FAT32-formatted boot partition and another formatted with either Btrfs or ext4.
For the installation of BredOS you need a 512MB boot partition and at least 8GB root partition.
¶ 3.7 The oven is heated up
- Since the dough has risen and the oven is hot, we pause to check that we did not forget anything. Luckily Bakery has automatically created a checklist for us.
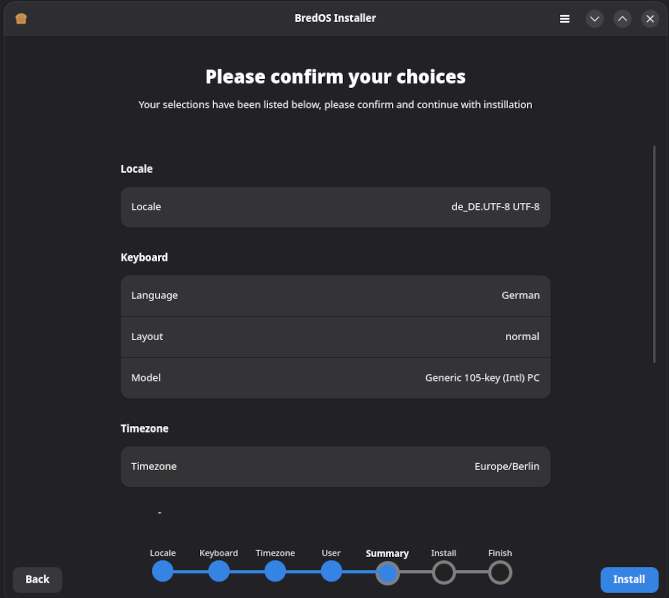
Please check that everything is included: flour, water, salt, and yeast. Was the kneading done properly? Did we let the dough rise long enough? If everything is okay, hit 'Install'.
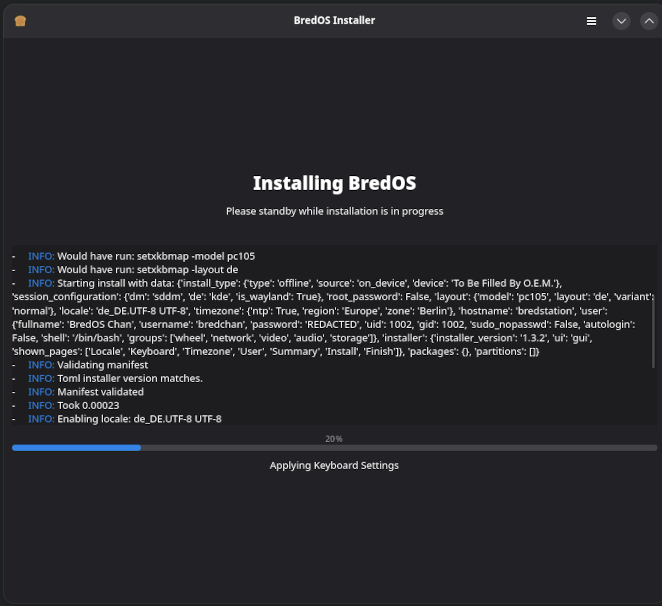
¶ 3.8 There is no better smell than fresh Bred
- Now grab a coffee or tea and stare into the oven for a while. Reflect on what you’ve learned in the Bakery while the pleasant smell of Bred tickles your nose. Enjoy this waiting time with eager anticipation as your Bred finishes baking.
¶ 3.9 Enjoy your Bred
- Serve your Bred however you like it — plain, with cheese and marmalade, a generous amount of sriracha sauce, or with a nice, fresh fried egg. We know that Bred can be enjoyed in countless ways, and we love them all.
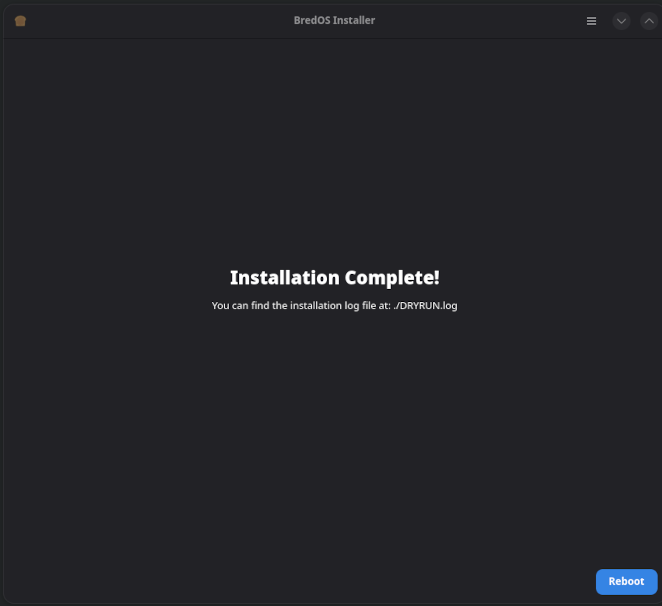
Now sit down and get comfy with your BredOS. See this as your starting point, not the destination. Feel free to customize everything to your liking, and don’t hesitate to share your questions, experiences, and cool projects on our Discord and Telegram channels.
You may want take a look at our how to's. But please be aware that authors over at how to's tend to use are more techincal tone.