¶ 1. Introduction
- This guide will lead you through the process of updating your Radxa Orion O6
UEFIfirmware to the BredOS one.
¶ 2. Features
- Front Panel USB Port fixed.
- CPU speed is fixed to actually running with 2.6GHz.
- ACPI fixes.
- Fix for bluetooth/wifi cards.
- M.2 ssds doesnt dissapear randomly.
UEFIresolution fix.- Ability to lower PCIe link speed.
¶ 3. Installation
¶ 3.1 Prerequisites
- The
UEFIinstallation .zip file found here. - For
3.2 in-place update-> FAT32 formated USB Stick. - For
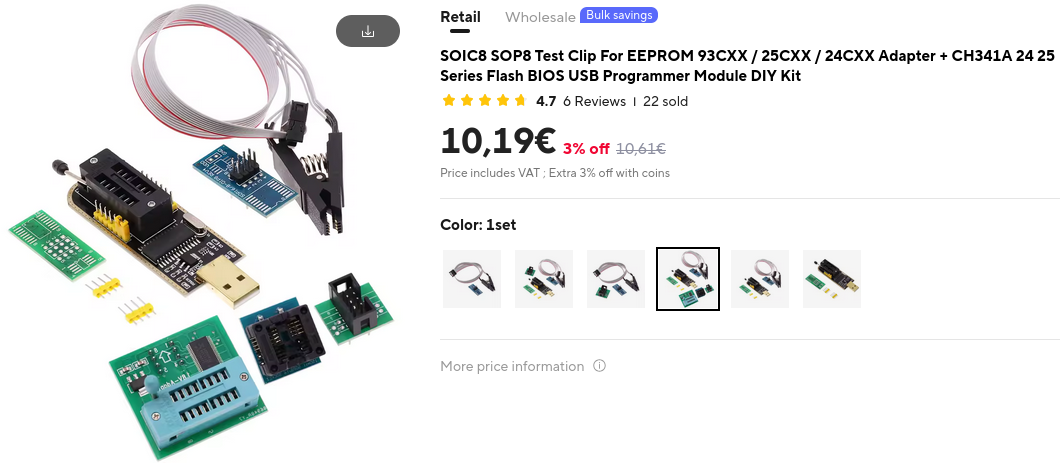
3.3 Update through flasher-> A CH341A-based flasher.
A very handy pack including the flasher, clip, and other useful accessories can be ordered here:
https://www.aliexpress.com/item/32263275388.html
If the link has expired, feel free to give us a heads-up on Discord or Telegram.
¶ 3.2 In-place update
You can install our UEFI firmware from within the Radxa UEFI by following these steps:
- Format your USB stick to FAT32 and place the contents of the zip file in the root directory of the drive.
- The content of your USB stick should appear as follows:
BuildOptions
BurnImage.efi
cix_flash_all.bin
cix_flash_ota.bin
FlashUpdate.efi
Shell.efi
startup.nsh
VariableInfo.efi
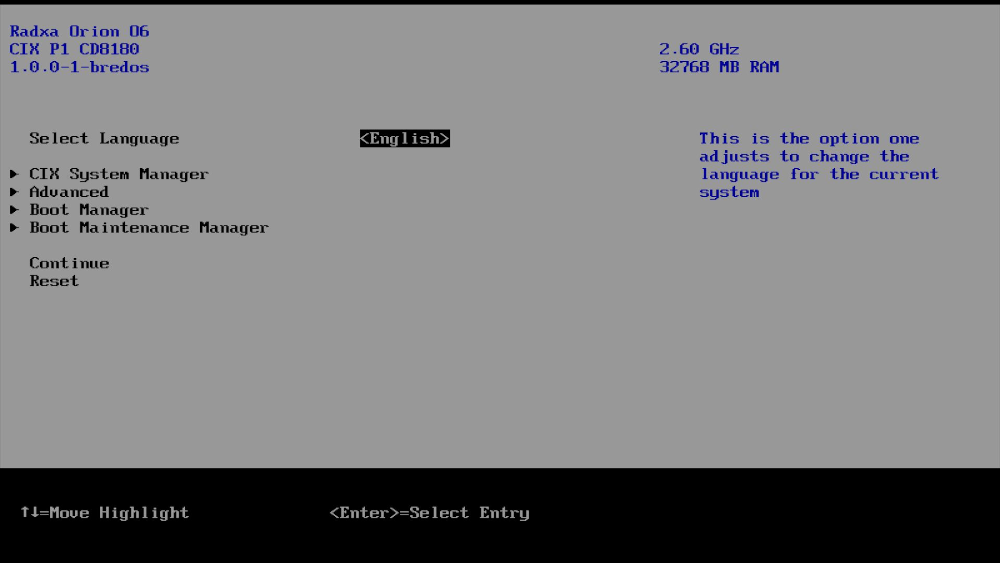
- Boot up your board into
UEFI. If you have trouble accessing the UEFI Settings, check this guide. - Navigate to
Boot Manager->UEFI Shellto enter the command line interface. - The update process should start automatically.
After a successful update, shut down the board and disconnect it from the power source for at least 10 seconds!
¶ 3.3 Update through flasher
If you have trouble booting the Prions UEFI or prefer using a flasher follow the steps below.
Ensure that your flasher is set to 1.8 volts! Use the 1.8V-Adapter to do this.
¶ 3.3.1 Prepare
- Install the tool
flashrom.
sudo pacman -S flashrom
- Unpack the UEFI .zip file and identify the size of the UEFI binary file.
du ./cix_flash_all.bin
- The output will show you its size in bytes.
6288062 ./cix_flash_all.bin
In the example above the file size is 6288062.
- To match the chip's specifications, we need to add "zeros" to the end of the file until it matches the chip's size. Replace
<your file size here>with the file size from the command above.
dd if=/dev/zero bs=1 count=$((8388608 - <your file size here>)) >> ./cix_flash_all.bin
¶ 3.3.2 Connect to SPI
Ensure that your board is disconnected from power while removing or inserting the SPI chip!
The SPI chip on the Prion is socketed for easy removal. The socket is located between the CPU fan header and the GPIO port. To easily locate the chip refer to the documentation by Radxa found here.
- The socket features two latches that must be opened before removing the chip.
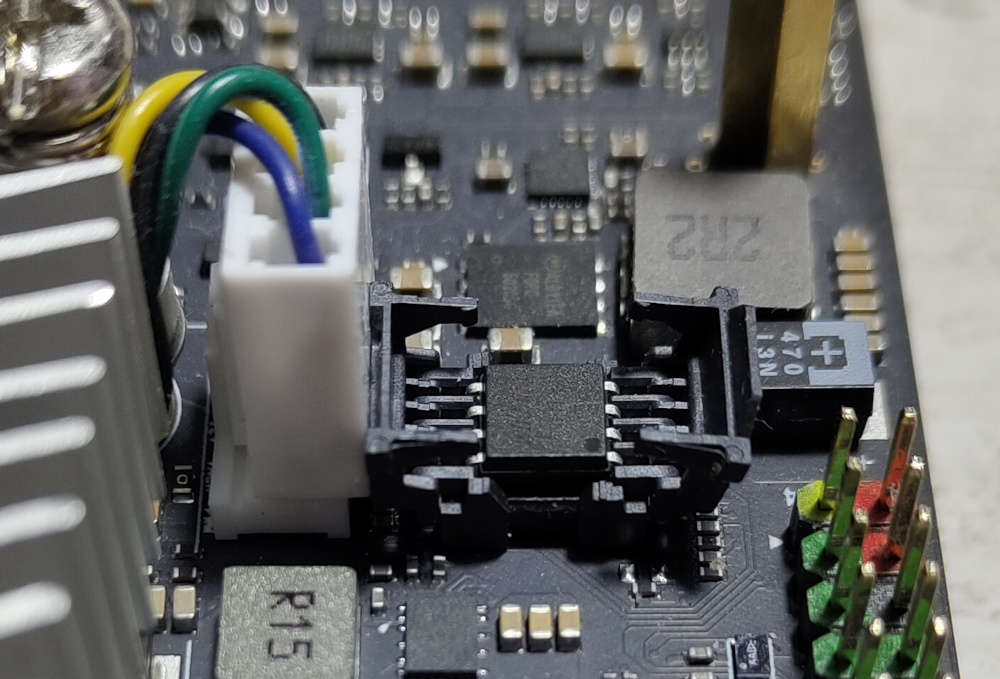
- Remove the SPI chip from the Prion.
- Connect the 1.8 Volt Adapter to your flasher.
- Connect the ZIF board to the 1.8 Volt Adapter.
- Pin 1 is marked with a dot on the chip. While the USB port of the flasher faces toward you, pin 1 is on the upper left side. Refer to the screenshot below to get the orientation right:
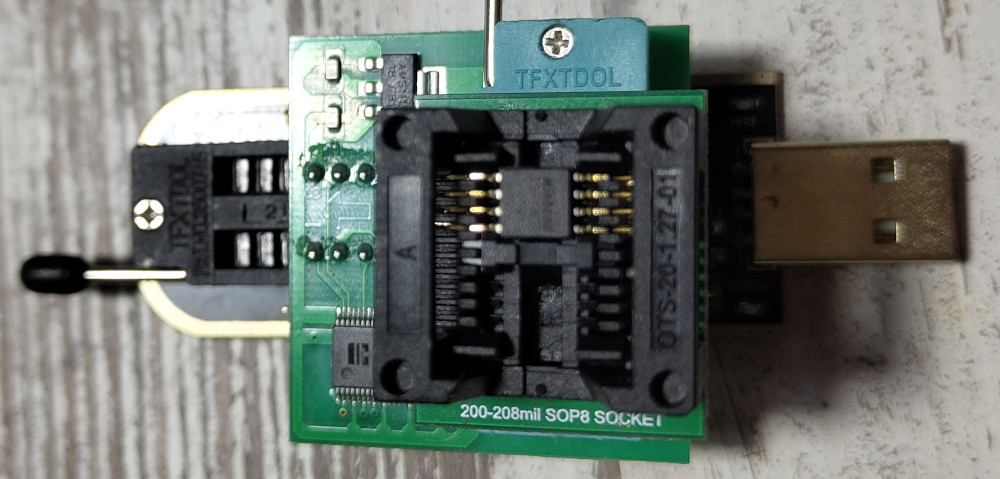
- Insert the chip into the ZIF Connector.
¶ 3.3.3 Flash new Firmware
- Connect the flasher to your PC and start flashing with:
sudo flashrom -p ch341a_spi -w ./cix_flash_all.bin
If you see the text "VERIFIED," the firmware has been flashed correctly.