¶ 1. 簡介
For the installation of BredOS we provide device specific images which are tailored to work out of the box for its specific device. This distinguishes these images from installation via an ISO image. Installation via an ISO image is much more generic, but is supported beyond the devicesupport we offer.
If you can't find your device on our download site and your device supports booting via UEFI, feel free to give the ISO installation a try.
¶ 2. Download
You can find download links for images in our website!
¶ 3. 安裝
Installation varies from device to device and the medium you want to install BredOS to. In this guide we will cover installation to
3.1 non-removable eMMC3.2 removable eMMC and SD Card3.3 nVME
Before you begin please check which options are available with your device!
¶ 3.1 non-removable eMMC
To cover the variety of operating systems you can use for this, we decided to split the installation to non-removable eMMC into these two guides:
- Flashing the eMMC with Linux or macOS
- Flashing the eMMC with Microsoft Windows
¶ 3.2 removable eMMC and SD Card
If you are familiar with flashing Raspberry OS no further reading is needed. Just grab your SD-Card or eMMC, your device specific image and flash with your preferred Tool.
In the following we describe how to flash eMMC with an adapter. If you do not own a suitable adapter leave the eMMC connected to your SBC and follow 3.1 non-removable eMMC.
¶ 3.2.1 Get your removable eMMC ready
Skip to
3.2.2 Flashing eMMC / SD Cardif you are not using eMMC storage.
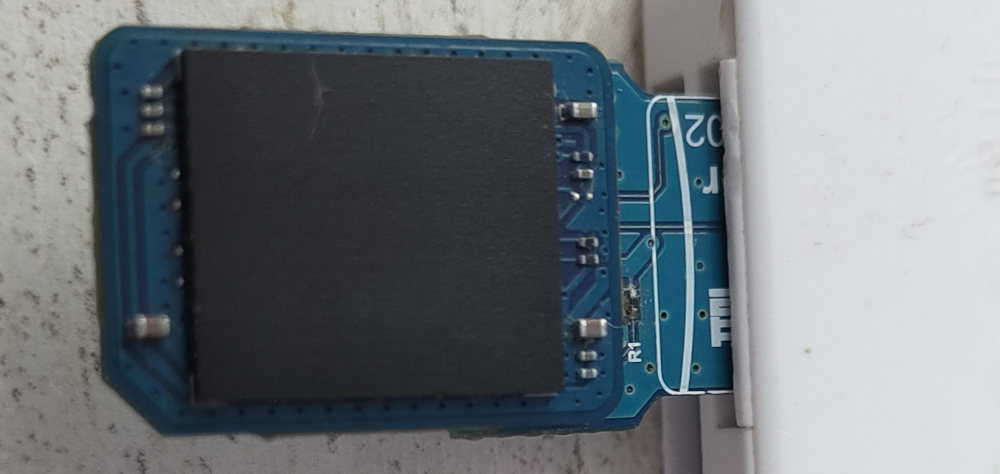
¶ 3.2.1.1 with uSD adapter
- As a eMMC is basically an SD Card which is (mostly) hardwired to the SBC there are adapters you can connect your eMMC to to convert them into an SD Card.
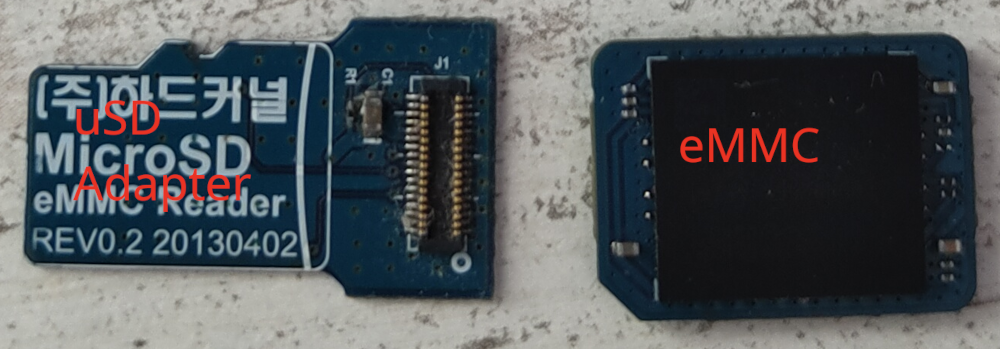
Firmly press the connector of the eMMC onto the uSD Adapter and connect them to your SD Card Reader.
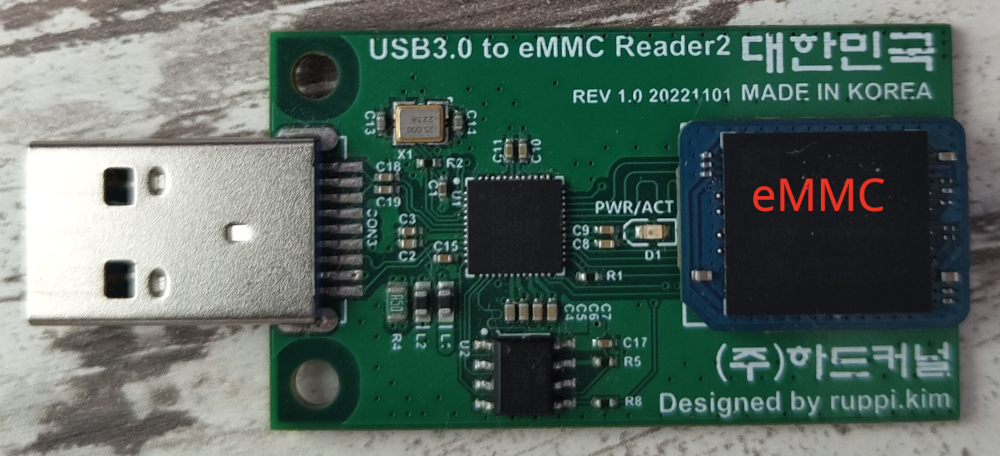
¶ 3.2.1.2 with USB to eMMC adapter
- As almost all commonly known USB Sticks are based on eMMC storage there are USB to eMMC adapters out there which are USB-Sticks but with removable eMMC storage. These can be used to flash BredOS too.
¶ 3.2.2 Flashing eMMC / SD Card
There are countless tools to flash an sd card or eMMC. In this guide we will cover BalenaEtcher and Raspberry Pi Imager. Both tools offer support for Linux, macOS and Microsoft Windows.
- BalenaEtcher
- Flashing with Raspberry Pi Imager
We provide images compressed as .xz files. Make sure you decompress them before flashing!
¶ 3.3 nVME
¶ 3.3.1 Prerequisites
As direct booting from the nVME drive is not supported by our devices we need to install UEFI to a different medium. After UEFI is booted you then are able to boot from the nVME drive directly. To install UEFI to your SPI or SD Card follow this guide.
¶ 3.3.2 Flashing nVME
Connect the drive to your PC, either directly or via a USB adapter. After flashing connect the drive to the nVME port of your SBC. Then use one of the recommended tools in 3.2.2 Flashing eMMC / SD Card, making sure to use the correct drive letter or path for your NVMe drive.
¶ 3.3.3 Boot Order
The UEFI should be able to pick up the drive by itself. However the order of devices it will try to boot from can slow down the bootprocess or even fail completely (e. g. if you have a PXE Server in your network). To change the bootorder follow this guide.
After successful installation proceed with First Setup